Lesson 86: Custards

Wednesday, March 31, 2010

This week feels really weird. Only 2 days of classes and then it's the weekend again?! Today was a bit of a reality check as we realized we were already in lesson 86! Next week we will be completing module 4 and getting ready to move into our final module in culinary school!

Since our practical exam is next Friday, we began today's class with some skill drills. I got a little better at writing "Happy Birthday Allie!" I still need more practice before the exam though. I'm becoming a pro at making cornets. I practiced making some yesterday at home, so I breezed through making them today.

After we cleaned up all of our melted chocolate scribbles, we got started on today's recipes. All of our recipes were focused on custards, both stirred and baked variations.

I worked with the other Allison to start our creme brulees. These started out with a mixture of cream, sugar, egg yolks, and a split vanilla bean. We had to simmer the cream, sugar, and vanilla and then temper in the yolks. We filled up ramekins to the brim and baked them in a water bath until they were set, but had no color. (2 of ours in the back of the oven did get some color..)

Once these were done, we wrapped them with plastic and put them in the freezer for tomorrow. We will be TORCHING them and EATING them in tomorrow's class!

Next, we completed our bread pudding. We had the choice of making individual ramekins or one large casserole. Allison and I decided to make the individual versions. Desserts are always cuter and somehow less sinful when you get your own small serving :)

The custard in this baked dessert was very similar to the creme brulee (with the addition of some whole eggs). We added a touch of rum to the custard at the end (but not too much.. I hate boozy desserts!) For some of the ramekins, we used cubed French baguette. I brought in some of my mom's homemade Easter bread for the class to try and there were a few slices leftover. I decided to cube those up and use it for some of the puddings. It turned out great--really soaked up all of the flavors of the custard!

I never was a fan of bread pudding, but I LOVED these puddings! I brought some home for my parents to try and my mom went crazy over it (and she isn't a huge dessert person). She said it was the best dessert she ever had and now wants me to make some for Easter!

Later on in class we made creme anglaise, which is a slightly thick cream sauce for desserts. We served our bread puddings with it and a sprinkle of powdered sugar...... amazing.

We also made a batch of ice cream in each group (that we will complete tomorrow). The custard for the icecream was much like the other custards except it was cooked a bit longer to cook out the eggs (because it's not baked). We were able to choose a flavoring for our icecream. I'm really excited about the one we chose: Ginger! We made the flavoring sauce by simmering water with some grated fresh ginger, vanilla, cinnamon stick, and lemon zest. After straining the liquid, we added it right to the ice cream custard. I loved the slight kick the ginger brought to the ice cream. I'm so excited to try the final product tomorrow! Here's Allison trying some of our un-finished ice cream:

Ricotta Pie & Walnut Lentil Loaf

Monday, March 29, 2010

Today was a rainy, boring day off from school. I decided to make the most of my time and do some baking/cooking. I had so much fun spending the day in the kitchen!

I started out by making a recipe from Chef Chad's recreational class that I helped out with on Saturday. It's his grandmother's recipe for ricotta pie. This sounded like a nice Italian Easter pie that my grandparents would love. My mom is bringing it over to their house tomorrow so they can have it for lunch or dinner this week. I make one exception for baking/cooking for family and friends.. I have to try it!! I will have to make them promise to save me a slice :)

I started out by making the crust, which is sweet and sturdy (kind of like a pate sucree, if I had to compare it to the doughs I've made in school).

-Place 2 cups of sugar, 4 egg yolks, and the zest of one lemon in a bowl of a kitchen aid mixer. Mix until well blended. Add 1 pound of butter gradually while the mixer is on. Slowly add in 4 cups of all-purpose flour. When the dough pulls together, pour out on a floured surface and mold into 2 disks. Wrap and refrigerate for at least an hour.

While that chilled, I made the filling:

-Melt about 3 T butter in a saute pan. Saute 1 large onion (chopped) until tender. Mix in 2 packages of thawed spinach (strained of excess liquid), salt, pepper, and nutmeg to taste (I also added in some golden raisins). Saute for a minute and remove from heat.
-Combine 15 oz ricotta, 8 oz grated fresh mozzerella, and 1 cup grated parmesan. Mix in 3 large eggs and add in the spinach mixture.
-Cut one of the disks in half (reserve the other disk for another use--I froze it for a pie I'm making later on in the week). Roll out each portion to fit a 9-inch pie pan. Line the oiled pie pan with one piece of dough. Spoon in the cheese/spinach mixture. I used a fancy cutter to make strips for a lattice top out of the second piece of dough.
-Bake in a 350 degree oven for about 45 min- 1 hr.

Here is the pie before I baked it:
After it came out of the oven it looked like this:

It's a beautiful pie that I know my grandparents will love!

After this was done, I got started on dinner. I've been wanting to make this recipe for Walnut Lentil Loaf from my mom's Clean Food Cookbook. I've read articles in other blogs about this recipe and it sounds soo healthy. I was really curious about how all of these ingredients would pull together to make this vegetarian loaf. Here's the recipe that I followed almost exactly:

1 cup dried lentils (I used red lentils)
3 cups vegetable stock
1 thumb-size piece kombu (I've used this ingredient to make miso soup on Japanese soup day in school!)
3 T. ground golden flax seed
1/2 c. water
3 T. extra virgin olive oil (I used 2 T. coconut oil)
1 large yellow onion, diced
1 carrot, grated
1 stalk celery, minced
2 T. mirin
1 apple, peeled, grated with 1 T. lemon juice
1/4 c. raisins
3/4 c. toasted walnuts, chopped
1 tsp. dried thyme
6-7 dashes ume plum vinegar
fresh ground pepper
1 cup breadcrumbs (I used whole wheat panko)

1. Prepare lentils-- Rinse and place in a pot with stock and kombu. Bring to a boil and simmer until liquid is absorbed and lentils are tender. Remove from heat and discard kombu.
2. Prepare loaf-- In a small bowl combine flax seed and water. Reserve.
3. In a large skillet, saute onion, carrot, and celery in oil over medium heat. Add mirin and saute until the vegetables are soft. Add apple, raisins, and walnuts. Add the vinegar and pepper to taste. Remove from heat and fold in lentils, breadcrumbs, and soaked flax seed. Press mixture into a lightly oiled loaf pan.

For the glaze: (I heard the glaze was AWESOME so I made this recipe times 1.5..so glad I did!)
2 T. ketchup
1 T. balsamic vinegar
1 T. maple syrup
1 T. apple butter (I used pumpkin butter)
1 T. arrowroot

1. Combine all ingredients in a saucepan and heat over medium heat while stirring constantly. cook until thick, about 2-3 minutes. Spread over the loaf (I saved some extra for dipping on the side). Bake in a 350 degree oven for 40 minutes. Slice and serve!

Here's my loaf before I put it in the oven:

I made my favorite vegetable to have on the side : Kabocha Squash! It's not winter squash season anymore, but a specialty food store by my school (Garden of Eden) has great produce so I figured I'd give this squash a try.. It tasted really sweet and fresh! I also eat the skin because it has a ton of nutrients and crisps up really nicely in the oven:

I was glad I made this walnut lentil loaf ahead of time so that I could enjoy a glass of wine with my mom before dinner! Plus I had to celebrate some very exciting new I got today-- I will be interning with Good Housekeeping Magazine after my graduation in May! I am very excited to be given this opportunity!

Here was my plate with some of the lentil loaf and squash.

The loaf cut very nicely.. I was afraid it would be too mushy and wouldn't come out in nice slices, but it was perfect! I also loved the sweetness of the raisins and apples and the crunch from the walnuts. Not to mention, all of the nutrients in this meal! The glaze was so syrupy and sweet on top! I'm so glad I made extra!

Shrimp two ways

Sunday, March 28, 2010

By now you may have noticed that when I cook for my family, I usually have to cook a couple of variations to please everyone. Tonight was no exception.

Tonight was another night that we did not plan out dinner. These are my favorite types of nights. I LOVE making up my own meals with whatever ingredients we have on hand. Granted, I was not snowed in and had all afternoon to head to the grocery store to pick up extra ingredients, but what's the fun in that? I feel like making up my own meals will just give me extra practice for module 5 (starting in only 2 weeks!) where we will be given ingredients to work with and no recipes.

I had 3 proteins to choose from today: shrimp, lamb chops, and chicken. I feel like we always have chicken, so that was automatically eliminated. My mom doesn't eat red meat, so I also eliminated the lamb. That left SHRIMP. Here are the 2 recipes I came up with (they both turned out great!!)

Shrimp for the boys:
1/2 cup chopped onion
2 cloves garlic, minced
2 T. olive oil
About 20 shrimp, peeled & de-veined
2 15-oz cans fire roasted diced tomatoes
1 head broccoli, steamed
salt and pepper, to taste
salt-free Italian seasoning, to taste
1/4 cup fresh basil, torn
Whole Wheat Israeli Cous Cous for serving

1. Heat a large saute pan over high heat. Add the olive oil. Saute the onion until translucent. Add the garlic and cook briefly. Add the shrimp and saute until almost cooked through. Season with salt, pepper, and seasoning.
2. Add the diced tomatoes and broccoli. Tear in the basil at the end. Cook on low heat until everything is heated through and cooked. Taste and season.
3. Serve over whole wheat cous cous. Bon Appetit!

Shrimp for the Girls:

1/2 cup sliced onion
2 cloves garlic
2 T. coconut oil
About 10 shrimp
1 small package fresh spinach
1/2-1 cup halved cherry tomatoes
8 oz shitake mushrooms
1 can artichoke bottoms (or hearts)
salt and pepper to taste
salt free blend seasoning to taste
chicken broth, as needed.
whole wheat Israeli cous cous, for serving

1. Heat a large saute pan over high heat. Add coconut oil. Saute onions and mushrooms until water is evaporated and onions are slightly brown. Add garlic. Cook 2 min. Season with salt.
2. Add shrimp, tomatoes, and artichoke. Season with more salt, pepper, and seasoning. Add a little chicken broth to pick up the pieces at the bottom of the pan and to add moisture.
3. Add spinach at the end and cook on low heat until spinach is wilted and shrimp are cooked through. Taste and adjust seasonings.
4. Serve over Israeli cous cous (I also added a sprinkle of crushed red pepper). Bon Appetit!

I mentioned in my last post that I was helping Chef Chad out with an Italian Easter baking class on Saturday. I have two recipes from that class that I will be making later on in the week for Easter. I'll make sure to post the recipes and pictures of the results!

Lesson 85: Cake Decorating

Friday, March 26, 2010

It has been a crazy couple of days!! Yesterday I went into the city early for an interview with Good Housekeeping Magazine for my externship. I must say the Good Housekeeping Institute is very impressive! I had a few hours to kill before class, so I spent some time in Starbucks studying for the first Module 4 exam and grabbed some lunch at Whole Foods.

Yesterday's class began with the exam (I think I did well!) and continued with some cake baking. In groups of 2 we made three different types of cakes..and multiple of each type. We made a lemon-scented cake, "pan di spagna" (a sponge cake), and a chocolate cake. Here are our lemon-scented cakes right out of the oven:
We ended the class by making a batch of buttercream to reserve for the next day of cake decorating. Buttercream..is...amazing. I will never make another frosting other than buttercream because it is seriously the best!

Class ran a bit late yesterday, but I ran out to meet my date for the night :) .. For dinner we went to Blue Ribbon Restaurant (you can find my review here). Obviously, we ordered the bone marrow to start. It was amazing, just like last time!

I have to be honest, I was not looking forward to class today knowing that we had to decorate our cakes. I have never had the patience or creativity to decorate cakes. Not to mention, the lack of sleep from the past couple nights really caught up to me this morning so I was EXHAUSTED. However, I stayed focused during class, tried my best, and got it done!

It was sort of fun because we were able to experiment with different flavor ganaches, fillings, and decorations. We were basically given complete freedom with the types of cake we wanted to make, as long as we kept it neat and simple. I started out by choosing the chocolate cake to decorate. When I went to split the layers of the cake, it completely fell apart. The cake was so moist that it was extremely difficult to work with. I decided to ditch that idea and went for the pan di spagna.

I started out by splitting the cake into 3 layers. Next, it was time to layer up the cake. I laid down the first layer and brushed it with a simple syrup and hazlenut liquor mixture (to add moisture to the cake). Then, I spread on a layer of rich chocolate ganach and praline flavored buttercream. To make this flavored buttercream, I simple whipped in some praline paste into the prepared buttercream. Yummmmm.. this tasted soo good! Anyways, I continued to layer up the next 2 layers in the same fashion. After the top layer of cake went on, I brushed it with the simple syrup/liquor and then started frosting the sides of the cake with the praline buttercream.

This part..not so easy... We had to hold the cake in the air with one hand while we frosted the sides of the cake. Clearly, in this picture I was concentrating VERY hard:
Haha.. I seriously worked so hard today to not mess up this cake. After I frosted the sides, I frosted the top and then evened out the frosting so that it was smooth all around the cake.

Next, was the part I really hate.. piping. I made a twisted border around the cake. It wasn't perfect, but turned out okay. I definitely need practice with piping. I decorated the cake with chocolate shavings in the center with a few hazlenuts, candied lavendar for color, and crushed toasted hazlenuts around the sides. Drum roll please................

Ready?


For my cake?


And the side view:

Very basic, but I thought it was neat and pretty (besides a few piping mistakes..).

Who's the lucky recipient of this cake you ask? One lucky guy ;) ..as long as he gives me a slice to try!!!

I skipped wine class tonight because I needed SLEEP tonight and I had to get this cake in the fridge. Plus I'm heading back to school early tomorrow to help Chef Chad with an Italian Easter recreational class (should be fun!).

The Judge's Table

Wednesday, March 24, 2010

Today was such a fun day! It was chocolate day, so honestly how can that not be fun?! I ate a ridiculous amount of chocolate today by the way...

Our task today was to finish our petit fours from yesterday by tempering chocolate for dipping. We were encouraged to use our creativity with our decorations and to put together a final plate with our group for the final judging of our petit fours competition!

My group started out by making a truffle ganache for our champagne truffles. Once the ganache was prepared, we had to cool it so that it reached a thick enough consistency to pipe. After piping and cooling the ganache, we rolled each peice and coated it in the tempered chocolate and our choice of topping (cocoa powder, chopped nuts, or cocoa nibs).

We all worked really hard today trying to get as creative as possible and beautifying all of our small treats. The adrenaline was flowing as we worked on a time limit to present our dishes to Chef at exactly 4:30. The final presentations on the "judge's table" is shown above. Every group did such an amazing job! Each group even had a story for the plates, explaining what kind of party or situation the the plate was served in. Here is my group's plate:

Our story: The plate was designed for a large family party. There are a lot of different selections on the plate so that we can hand it off to the wait staff and they can pass around the petit fours to all of the guests. We made sure to really fill the plate because Grandma was coming to the party and she likes to stuff some extra cookies in her purse ;)

Unfortunately, we didn't win.. the plate in the lower left corner won! Chef decided to give us all extra points on our exam because he was really impressed with all of our plates.

I left class with an insane sugar rush and a huge smile on my face. I've really enjoyed class the past couple of week.. I'm loving pastry A LOT more than I expected to!

Just set my alarm for 5:30 am (eek!) ..better get to bed NOW!

Intro to Petit Fours

Tuesday, March 23, 2010

Today's class was all about little desserts that can be eaten in one or two bits (aka petit fours). We were put into new teams today to complete a full menu of 5 different desserts. The class was turned a little competitive today, since we were told that there would be a winning group who will get extra points on their practical. We had fun with it and accused other groups of "sabatoging" our desserts.

Matt, Henri, Mi, and I got started right away mis en placing our recipes for biscotti, marshmallows, macaroons, spritz cookies, and buttercrunch. I got to work on the buttercrunch by melting 1/2 pound of butter. I added in some sugar, water, and light corn syrup and brought the mixture up to a temperature of 300 degrees. I added in some toasted almonds and spread the mixture out on a sheet pan to cool and harden. Tomorrow we will be coating this candy mixture with tempered chocolate and more toasted almonds. Then, we'll break it apart into small peices like "candy bark".

After that was done I helped Matt pipe the spritz cookies onto sheet pans. These baked in the oven for a brief amount of time, until they hardened but had little-no color.

We're putting the finishing touches on all of our petit fours tomorrow and will be preparing a final presentation for judging time!

On another note, I brought a Kombucha beverage with me to class today and coincidentally Chef Chad told me about the Kombucha that he is currently making. Kombucha is a powerful probiotic that is made out of a colony of bacteria and yeast, along with fermented tea and sugar. He showed me his Kombucha and it looked a bit funky, but I'm soo curioius to try it! (I like weird healthy things!) The kombucha will be ready to drink tomorrow so he's going to let me try a bit :)

We ended the class with some skill drills, which involved making more cornets and piping "Happy Birthday, name" with melted chocolate. Here's my practice sheet.. I definitely need some practice!
I got home from school and guess what I had to eat? Leftover PIZZA from yesterday! Yup, 4th day in a row that I had pizza... not sick of it yet..

Lesson 81: Pizza Party!

Monday, March 22, 2010

Today was definitely quite the pizza party! Have I ever mentioned how much I LOVE pizza (both making it and eating it)?! Well, let's just say today's lessons was one of my favorites!

Remember the pizza dough we made on Friday? Chef Chris helped us out and punched it down for us over the weekend. Here is my group's batch after fermenting for the weekend:

We divided this massive blob of dough into 1 pound rounds and refrigerated them while we made our focaccia dough. The focaccia was fairly simple and took us no time at all to whip it up. We set our doughs aside to rise while we started on our PIZZAS.

Allison and I worked together to make our first pie: Pizza Margherita. Gotta love the simplicity of this pizza. Chef Chris was also kind enough to leave us some tomato sauce that he made (which is unbelievable) so we used this as a base to our pie. Next, we layered on fresh mozzerella and sliced tomatoes. We drizzled the top with a bit of basil/chili pepper olive oil and popped it into the piping hot oven (I'm talking 500 + degrees).

So, naturally I tried to toss my pizza dough in the air.... mmm.... not so good at it (but at least I didn't throw it on the floor... or on my head). I did get a couple of good throws in!

HOWEVER, I was not as good as Miss Emily! This girl should open up a pizzeria with her pizza tossing skills.. I was amazed!

After only 10 minutes, our first pizza was ready to slide out of the oven! I loved how fresh this pizza tasted with the simple ingredients and the crispy crust..yum!

After each group made an assigned classical pizza, we all worked on creating our own pizzas. Naturally, I immediately sauteed some veggies (mushrooms, spinach and onions) and made myself a delicious vegetarian pizza. I used Chef Chris's tomato sauce ...(I want to ask him what he put in this.. we'll see if I work up the guts to actually talk to him! He intimidates me..) I topped the pizza with goat cheese and a light sprinkle of parmesan. Now that's my kind of pizza!

Al made this massive calzone! How crazy good does that look?!

While we were finishing up our pizzas, we put together our focaccias. We also were given some freedom to do what we wanted with these focaccias. I love a simple focaccia with fresh herbs, so we just embedded some rosemary and topped it with a few sundried tomatoes and a sprinkle of salt. This focaccia was SO good! I've had focaccia that gets really dried out, but this one was so moist and flavorful. Here is ours before we put it in the oven:

Today was a great start to the week!!

Lesson 80: Bread & Pizza Dough

Saturday, March 20, 2010

Yesterday was a wonderful day for many reasons-- it was another sunny, warm day, it was Friday, it was going to be an easy bread making day in the kitchen, and it's going to be a gorgeous weekend!

We started out the class by making 2 types of dough: soft bread dough and semolina bread dough. After these were done, they had to ferment and rise for about an hour. While our bread was rising, we got to work on our pizza dough (that we're going to use on Monday). Instead of working in pairs, we made huge batches in our table groups.

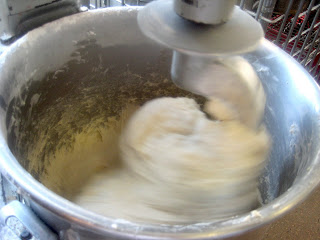
We had to use the extra large mixers:

We gradually mixed in the flour (very carefully so that it didn't get all over--one group had a little mishap with the flour and it showered all over them and the walls haha)

My favorite girls acting silly trying to scrape out the dough:

By the time the pizza dough was done, our bread doughs were ready to work with. For the soft roll dough, we made a variety of shapes. I made a simple 2-strand twist and a knot roll. I also made a bunch of "onion pockets", but most of them opened up in the oven :(

We formed loaves out of the semolina dough. Here is my loaf that I sprinkled with cornmeal:

After class I took advantage of the nice weather and went for a walk around the city. I sat in the park for a while and read/people watched.. it was wonderful. At 7:00 I headed to wine class to try some West coast wines! Here were my favorites:

Willamette Valley, Pinos Gris, Benton Lane 2008.
$15; A great summer wine. Very light & fresh. I tasted fruity apple and green pear. It was a bit acidic, but very pleasant.

Chalk Hill (Russian River), Sauvignon Blanc 2006. $33; A heavier white; rich with a calm acidity

Columbia Valley, Riesling, 'Eroica', Dr. Loosen, Chateau Ste. Michelle 2008. $23; light, sweet, and acidic. This wine goes great with spicy foods.

Napa, Zinfandel, Chateau Montelena 2006. $30; Very round and juicy wine. I tasted wild berries with a hint of earthiness. This was my favorite wine of the night!

Napa, Cabernet Sauvignon, 'Georges de Latour Private Reserve', Beaulieu Vineyard 2006. (I left before he gave the price for this one); Very complex with vanilla and mocha flavors. There were hints of very dark berries and oak.

Time to go out and enjoy the beautiful weather!

Brioche & Croissants

Thursday, March 18, 2010

I especially appreciated my quiet ride into the city today after yesterday's craziness! Wasn't the weather BEAUTIFUL?! I would have loved to go to the beach and go for a nice long run, but that'll have to wait until Saturday because today was all about baking brioche and croissants.

My partner wasn't there today so I had to do everything on my own. I noticed I was a bit sloppier than normal because I was trying to keep pace with the other groups, but overall I did pretty well! We started out by finishing our croissant dough that we started yesterday. When I looked at the recipe yesterday, I was under the impression we had to go through a similar laminating procedure as the puff pastry (not a fun thing). However, the croissants were A LOT easier since we took a shortcut by using the glorious Kitchen Aid mixer to cream our butter and flour. This was a billion times easier than pounding it out by hand. Also, the dough was so much easier to roll out.. so easy that we didn't even need a rolling pin for some of it.

After I laminated the butter into my dough (and doing some folding and rolling to create the layers), we let our doughs sit in the fridge while we worked on our brioche. Later on, we took our croissant dough out and formed classic croissants and petits pains au chocolat, which were just rolled with bittersweet chocolate batons. Here were just some of my regular and chocolate croissants.. they were so flaky!! I LOVED the chocolate ones!

For the brioche, we took out the dough that we completed yesterday and formed 3 different types of brioche. First, I made a classic brioche a tete. "Tete" means "head" in French, so this tiny roll has a small ball on top that acts as the head to the roll. This is the best part, since you can pull it apart from the rest of the roll. I formed the dough into a mold and Chef showed us how to strategically place the head on top. We proofed these in the proofer (which is temperature controlled with moist heat) before baking them. We also proofed the croissants and other brioche doughs before baking them so they could have a final rise before the baking process.

The other two brioche were completely up to us. I decided to grate up some gruyere cheese and make a ham & cheese brioche. I rolled out some brioche dough into a rectangle and lightly spread on dijon. Next, I layered on the ham, cheese, and a sprinkle of herbs de provence and carefully rolled it up. After freezing it for about 10-15 minutes, I sliced it up, proofed it and baked it. I actually almost burnt these because I completely forgot about them (the downside to not having a partner--you sometimes forget about items in the oven). Thankfully, chef caught them in time. They are a little darker than I would've liked them, but they were still really good.


The last brioche was a simple brioche loaf. I formed the dough into several small balls that I tightly placed inside the loaf pan. After proofing and baking, they rose together and formed this beautiful loaf:

It turned out wonderfully brown on top and golden in the middle. I remembered once I got home to get a picture of the inside of this loaf:

Brioche is a wonderful wonderful thing. It is such a rich, buttery, flavorful bread that can be used in so many ways. It reminds me a lot of my mother's special Easter bread (ahem, I believe it's almost Easter, mom.. time to start baking!)

Bagels & St. Patrick's Day Shenanigans

Wednesday, March 17, 2010

You know you're getting old when instead of joining in on the college kids partying on the train, you're thinking "will those kids just shut up?!!! Can't a girl ride on a train in some peace and quiet?!" I hate to admit how annoyed I was this morning with all of the kids drinking and being loud on the 10:30 train.. I mean c'mon, isn't that a bit early?! At least it entertained me a bit, until I put on my ipod to block them out.

It took me some extra time to get out of penn station this morning while dodging all of the drunk green people trying to get to the parade. I got to school at 12 for a meeting and then headed to class to make BAGELS! I've always loved a nice fluffy, chewy bagel!

After Chef demo'd the different doughs and explained the nature of yeast...and after I mistakenly admitted I was a Yankee's fan (I was totally just kidding, Chef.. I don't like the Yankees at all!!!), we got to work on forming the doughs with our partners. We started out by making the brioche levain. This yeast/flour concoction rested over the stove during the whole class so that it could ferment and rise. Next, we made the croissant detrampe that we will complete tomorrow (by rolling and folding in butter like puff pastry..ugh). The croissant dough will rest in the fridge until tomorrow, which "retards" the fermentation so that it does not over-ferment (the cold temperature slows down the activity of the yeast).

Finally, we began working on our bagel and pretzel doughs, which we were able to bake off today. The doughs were very similar, although the bagel dough was a bit drier than the pretzel. After the doughs rested, we formed them out into bagel and pretzel shapes and poached them for 30 seconds in simmering water.

Here are our bagels all ready to be poached:

After they were poached, we sprinkled on toppings (bagel salt, poppy seeds, and sesame seeds) and baked them in the oven until they were beautifully browned and puffed:

These were so so so so good! I had one right out of the oven with some scallion cream cheese (courtesy of Kim) and fresh sliced tomato.. I was in heaven.

We did the same thing with our pretzels (except added some baking powder to the simmering water).

The pretzels were also wonderful straight out of the oven (with some dijon mustard of course).

More obnoxious drunk people on the train ride home.. I should have passed out bagels and pretzels to sober them up hehe

Lesson 77: A sunny day for puff pastry

Tuesday, March 16, 2010

I cannot tell you how happy I was to see sun peeking through my window this morning! My brother was even extra joyful this morning and came into the kitchen singing "It's a beautiful morning!"

I was excited for class today so that we could bake and taste the puff pastry we made yesterday (my forearms were sore from yesterday's labor-intensive class!).. Chef Chad was also back today despite still feeling a little under the weather. Almost everyone was feeling unmotivated with pastry after yesterday's class, but we were back in the game today with Chef back to get us excited about what we were doing.

We started out by taking a portion of our large batch of puff pastry to make apple puff pastry strips. Here is the one I made. It's not perfect because some of the walnut frangipane went over the sides, but it was still tasty! :
Next, we made palmiers (or what us Jersey folks call "elephant ears"). My batch actually started unrolling halfway through, but Chef helped me salvage the pastrys and they came out perfect! Lots o'sugar in these babies!

One of my favorite puff pastry creations today were these paillettes. They were just strips of puff pastry rolled with parmesan and paprika.

Once we finished making these traditional pastries, chef assigned each table to make a large batch of a different savory pastry. My table made a very large batch of mozzarella and prosciutto turnovers. These were AMAZING. We formed disks of the puff pastry and made a filling with fresh mozz, parsley, and fresh prosciutto. After adding a small dollop of filling to each disk, we folded the dough over like a mini calzone and sealed them closed with a fork. Yum yum yum!

I got to bring home a lot of puff pastry treats to my family. Despite most of them being on a diet or being allergic to everything, they couldn't resist the buttery, flaky creations!

Tomorrow we're making bagels and pretzels! Maybe we can make green bagels for St. Patrick's day.. That was always a tradition when I was younger on St. Patrick's day--to go to the bagel shop and get a green bagel. Sooo I may have to bring green food coloring to class tomorrow and do a little convincing ;)

Lesson 76: Puff Pastry

Monday, March 15, 2010

I remember when I first went to visit ICE back in September with my mom. We were given a tour and looked in on a class that was making an apple tart with puff pastry. The adviser giving us the tour told us they were using puff pastry that they made the day before. I was amazed that they made their own puff pastry and remember thinking "I can't wait for that to be me!" .. Well, today was the day that I finally learned how to make puff pastry.

Four hours later... I must admit that I would rather buy a frozen package at the grocery store. It was a lot of hard labor and repetitive steps. It seemed like we worked so hard today with very little pay off (since we didn't make anything out of the pastry).. so maybe it'll all seem worth it tomorrow when we actually produce something.

Chef Chad was sick today so we had a substitute chef :( We started out by making a dough (similar to the pate sucree from last week). While the dough rested in the fridge, we started pounding out butter (to soften it while keeping it cold). The amount of noise in the kitchen was deafening as we all pounded the rolling pins as hard as we could against the butter. It was a good way to get out any anger or stress!

Clearly I didn't have any anger or stress today because I was smiling :)

Here's the 2 pounds of butter pounded out into an even square:

We worked in teams of 2 to work on the first large batch of puff pastry. We rolled out our dough into sort of a diamond shape. We placed the butter square in the middle and folded the dough over it like a package:
Next, we rolled and rolled and rolled until it was a large, thin rectangle. We folded the dough like a book and continued to roll and roll to form another large, thin rectangle (this is what forms all of the layers of dough and butter). After folding the dough again, we let the puff pastry rest in the fridge. Later on, we rolled and folded another 2 times.

Each student also made their own puff pastry (just a smaller version). So I had to bang on some more butter and roll and fold dough a million times....

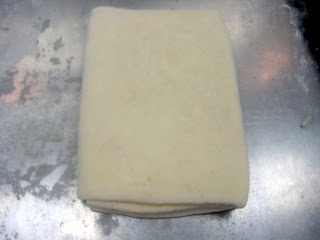
Here was my final puff pastry nice and folded:

Well, lets hope that's the last time I have to make puff pastry.. it was definitely a process. I am curious to see how it tastes in the various recipes tomorrow (both sweet and savory).

On another note, I cooked a delicious dinner this weekend! I had a special guest over for dinner on Sunday night (who I really wanted to impress). I finally got a chance to make homemade pasta at home, since I have been dying to make it since making it in class. I made a few slight changes and added half whole wheat flour to the mix. I hand cut the pasta into a thick fettuccini/pappardalle.

I made a hearty meat sauce to go along with the pasta. I used Anne Burrel's recipe for pasta bolognese. I would say I followed the recipe exactly, but let's be serious, when do I ever do that? I substituted a mix of ground angus beef and ground veal for the meat. I also made some other slight changes along the way with different spices and added half beef stock instead of just water.

I started out by pureeing mirepoix and garlic and browning it in a large saute pan:
After adding the beef and tomato paste, I added in my uncles' homemade merlot. I measured out the 3 cups that the recipe called for and noticed a drop left in the bottle. I looked at my mom and she just said "go for it"! Sooooo I did..

After about 4 hours of simmering, the meat sauce was beautifully thick and rich:

I forgot to take a picture of the final pasta dish, but I took a pic of the leftovers this morning. The sauce looks thicker because it was sitting in the fridge overnight..

I came home from school and found my dad enjoying the leftovers.. He loved it! Hopefully my guest on Sunday did too :)

La Bella Cucina Copyright © 2009 Designed by Ipietoon Blogger Template for Bie Blogger Template Vector by DaPino